
DIY LEGO Table: How to Turn an IKEA FLISAT LEGO Table + Sensory Table in One
This post may contain affiliate links. Please read my disclosure policy.
If your house is anything like mine, LEGOs somehow end up everywhere. Under couches, in corners, inside shoes—nothing is safe. 😅
Our kids recently inherited their dad’s old LEGO collection (which was honestly the coolest thing ever to watch unfold). As soon as we decided they were old enough to play with them, the floodgates opened… and so did the chaos.
I knew we needed a better way to contain the bricks and encourage building without taking over our entire living space. But I wasn’t interested in buying one of those big, bulky LEGO tables that cost a fortune and only serve one purpose. So I got to thinking…how could do a DIY LEGO table?
What if I could repurpose something we already had?
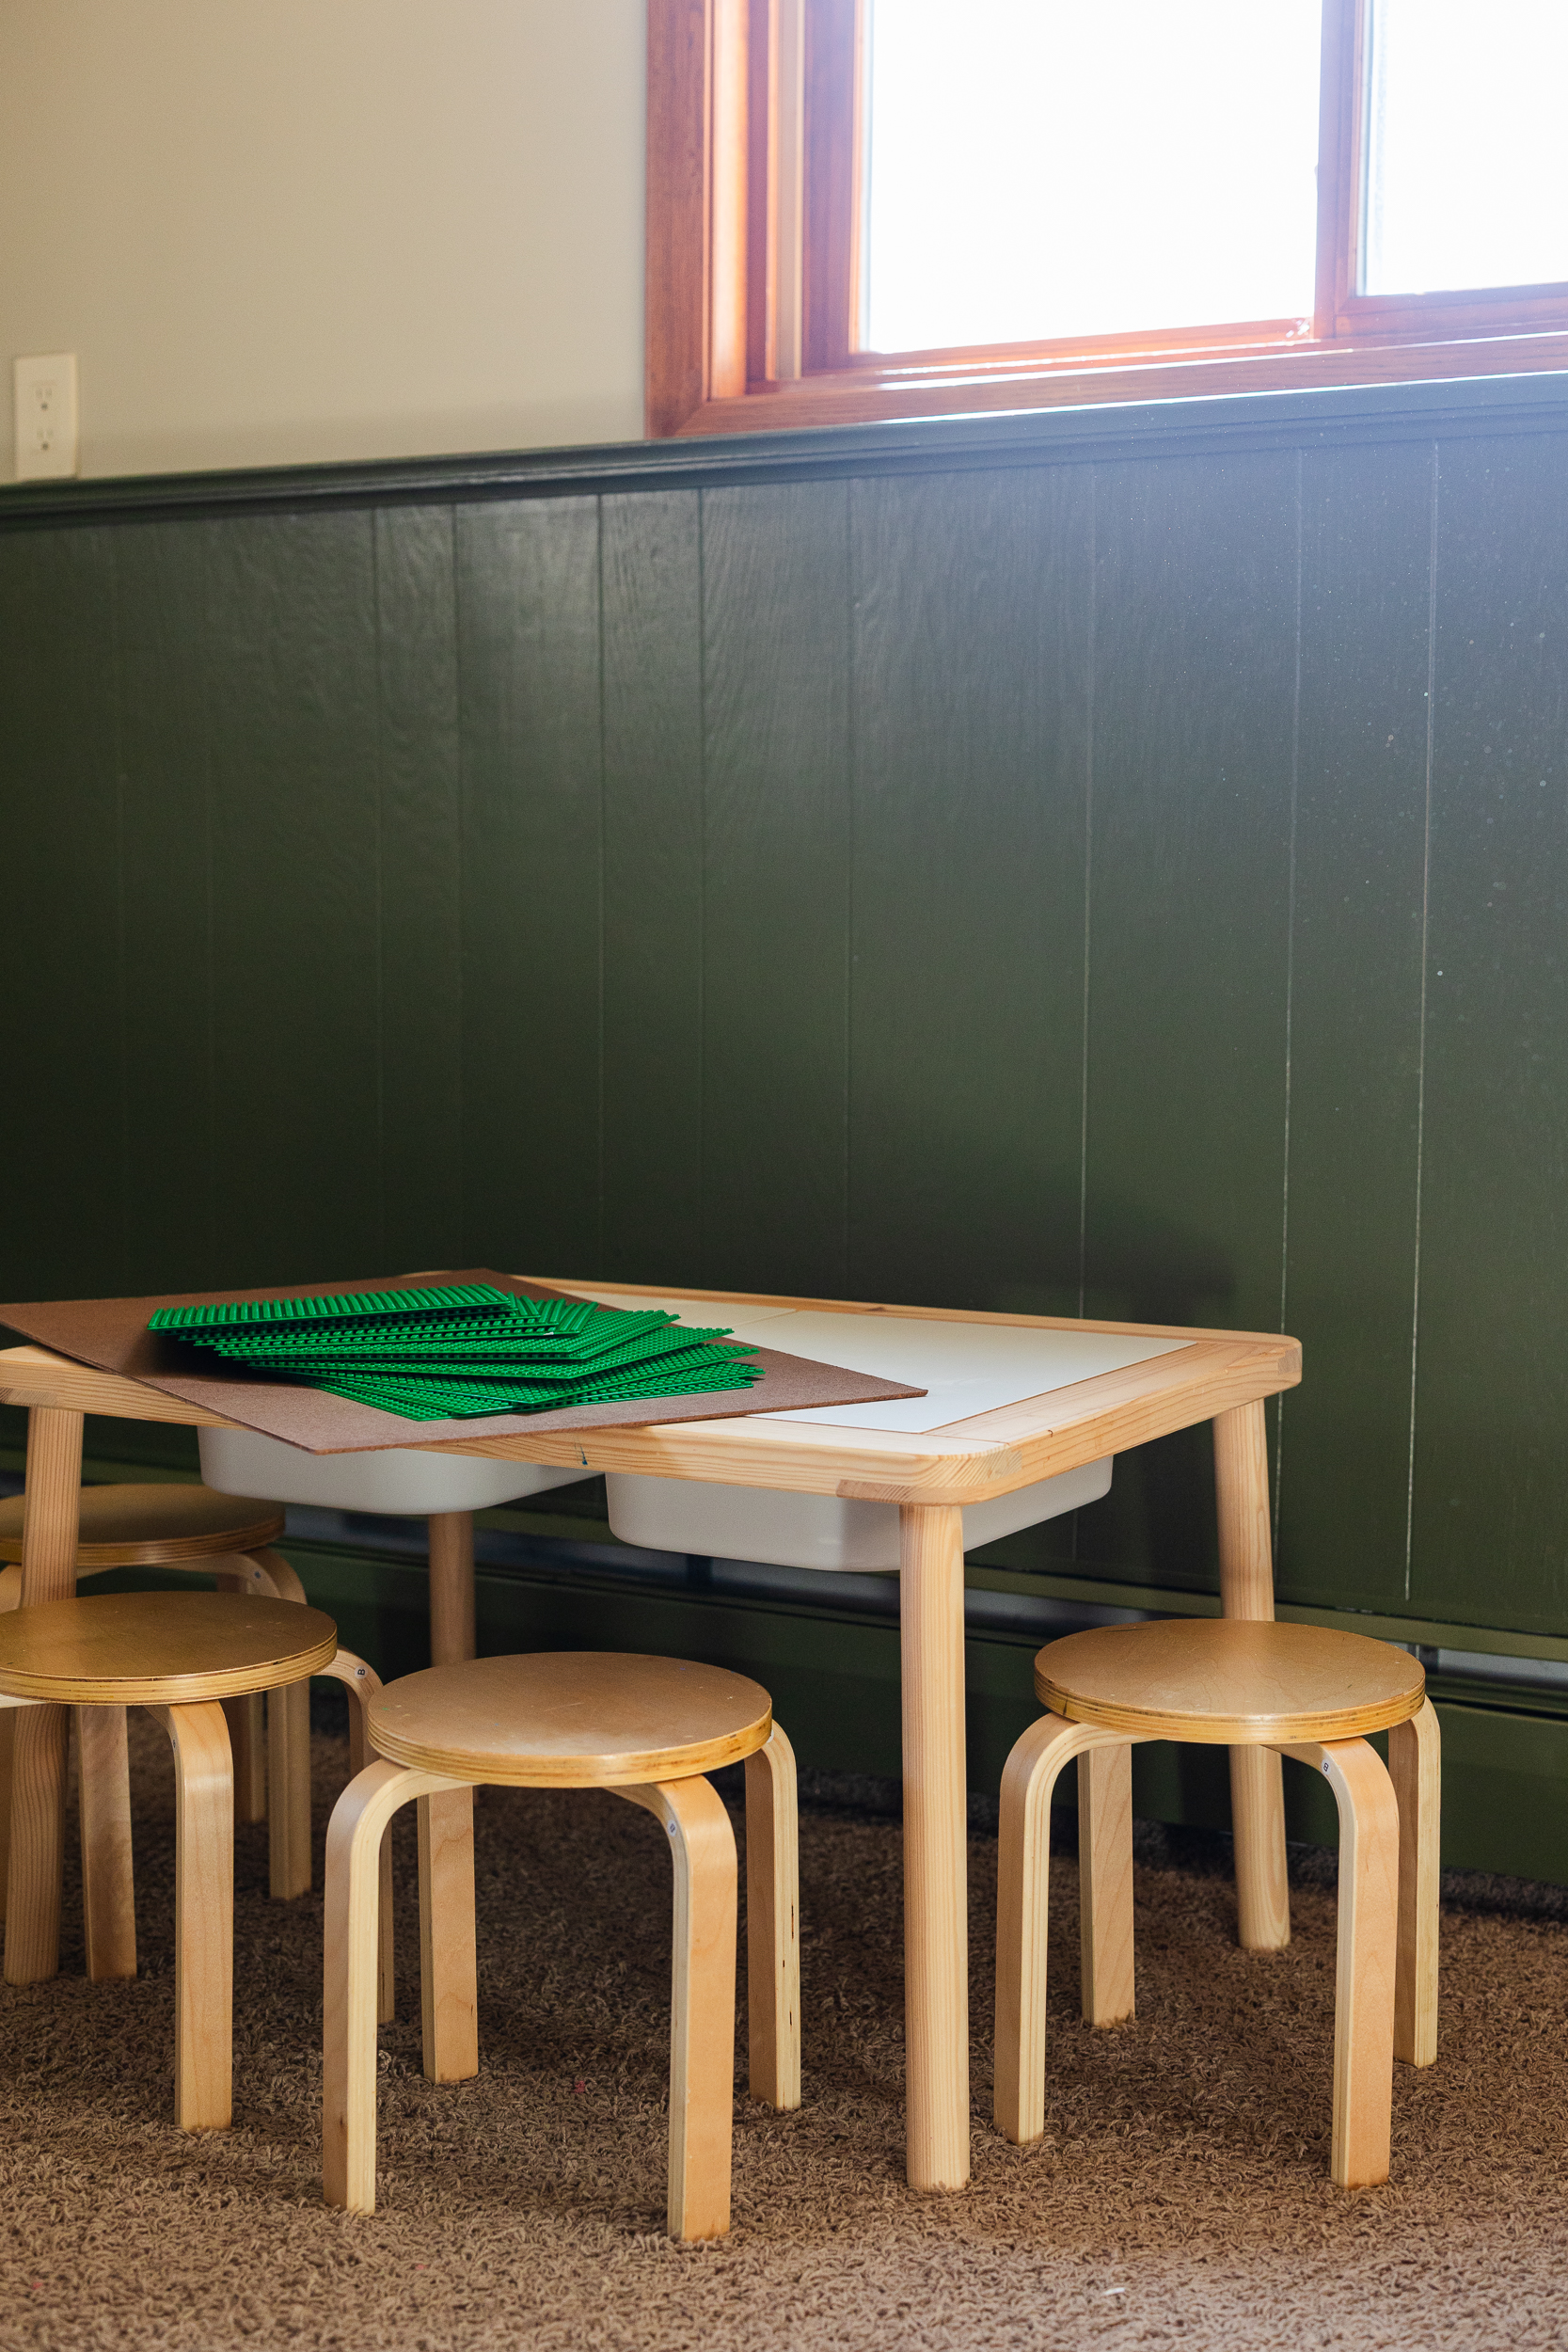
Enter: our trusty IKEA FLISAT sensory table—you know the one. Two bins underneath, easy to wipe down, and honestly, one of the best toddler investments we made.
The kids LOVE this table. They use it for a variety of sensory and art activities. I love that the table has covers that can be removed and when I was thinking about making a DIY LEGO table, it seemed like the perfect fit!
What You’ll Need:
- 1 small sheet of MDF (I found mine at Home Depot and had it cut to size)
- Peel-and-stick LEGO baseplates
- Utility knife (to trim the baseplates if needed)
- Table Saw (optional) –
- A handful of actual LEGO bricks (to help keep the baseplates aligned)
Step-by-Step: Turning a Sensory Table Into a LEGO Table
1. Measure your table surface.
First, I measured the top of the IKEA FLISAT table and brought those measurements to Home Depot. I looked for the smallest MDF sheet I could find to keep things light and manageable.
2. Cut the board cut to size.
We own a table saw that we’ve used for other projects so I was able to rip the MDF board to the exact measurements I needed. If you don’t own a table saw, you could ask the team members at Home Depot (or another home improvement store) to to cut the MDF down to the exact dimensions of the tabletop. If you have your own saw at home—amazing. But most big box stores will do this for you at no cost.
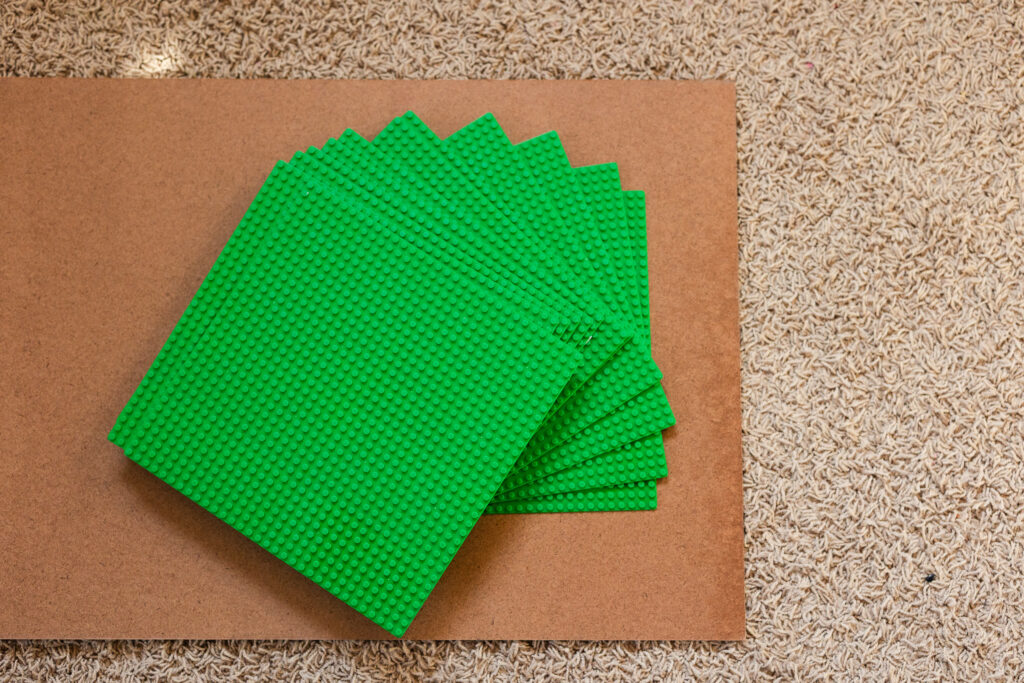
3. Lay out your baseplates.
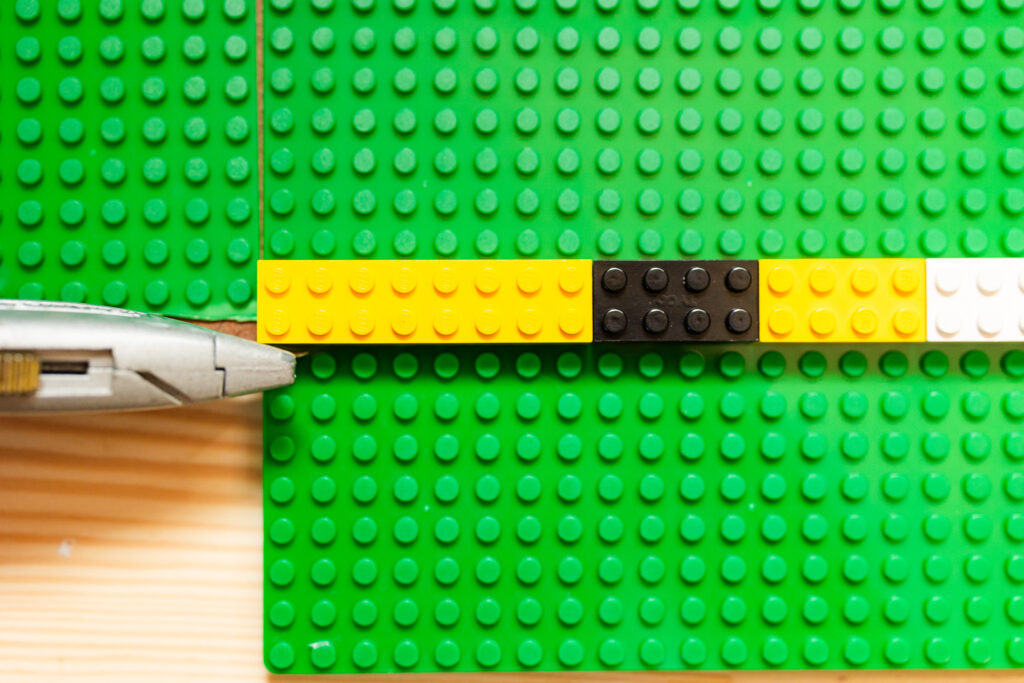
Before peeling anything, I laid out my baseplates to determine how many I would need, and if I would need to trim any down to size. For those that I needed to trim, I used actual LEGO bricks to create a line where I could score the plate with a utility knife and snapped them cleanly.
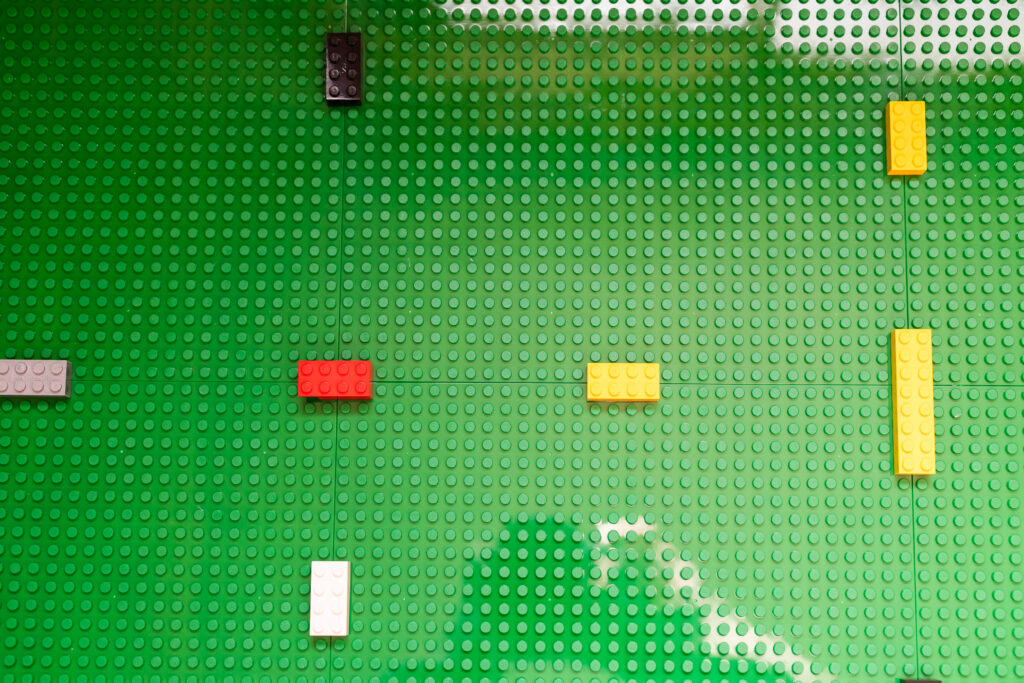
4. Stick and trim as needed.
Once everything was lined up and trimmed to size, I peeled the backing off and stuck the baseplates to the MDF board. Then I used actual LEGO bricks to keep things together. This step is so important! It helps make sure your baseplates are evenly spaced so bricks don’t pop off or misalign during play. I left it for an hour or so before removing.
5. Set it on the table—done!
No need to glue it down permanently. It fits perfectly on top and can easily be removed if we want to switch it back to a sensory table.
Why We Love It:
- It’s still functional. The bins underneath? Still totally usable for LEGO storage, sensory materials, or whatever else we need.
- It’s simple and non-permanent. If we ever want to switch it back, we can.
- It’s way more affordable than buying a specialty LEGO table (especially one that doesn’t grow with your kids).
- It encourages open-ended play without sacrificing space in our home.
Total Cost Breakdown
- MDF board: ~$10
- Peel-and-stick baseplates: ~$20 (depending on how many you need)
- LEGO bricks for alignment: Free (we had plenty 😂)
Not bad for a project that’s getting regular use and saving our feet from surprise LEGO landmines.
Final Thoughts
This little project was so simple—but made a huge difference. The kids love having a dedicated space to build, and I love that it keeps the mess (mostly) contained. Plus, knowing we didn’t have to buy something new or lose the function of our sensory table? Win-win.
If you’re navigating the LEGO stage too, I highly recommend this easy IKEA FLISAT DIY LEGO table hack. It’s budget-friendly, beginner-friendly, and a great way to extend the life of furniture you already own.
Got questions or thinking about doing this project yourself? Drop them in the comments—I’d love to help!